illogic-al
-
Posts
544 -
Joined
-
Last visited
Content Type
Profiles
Forums
Events
Everything posted by illogic-al
-
Why won't mandrake put firefox in their distro?
illogic-al replied to io333's topic in Everything Linux
AFAIK firefox is still in contrib and has been since .6 days. If you mean when it'll be a part of main, that'll probably be when it hit's 1.0. -
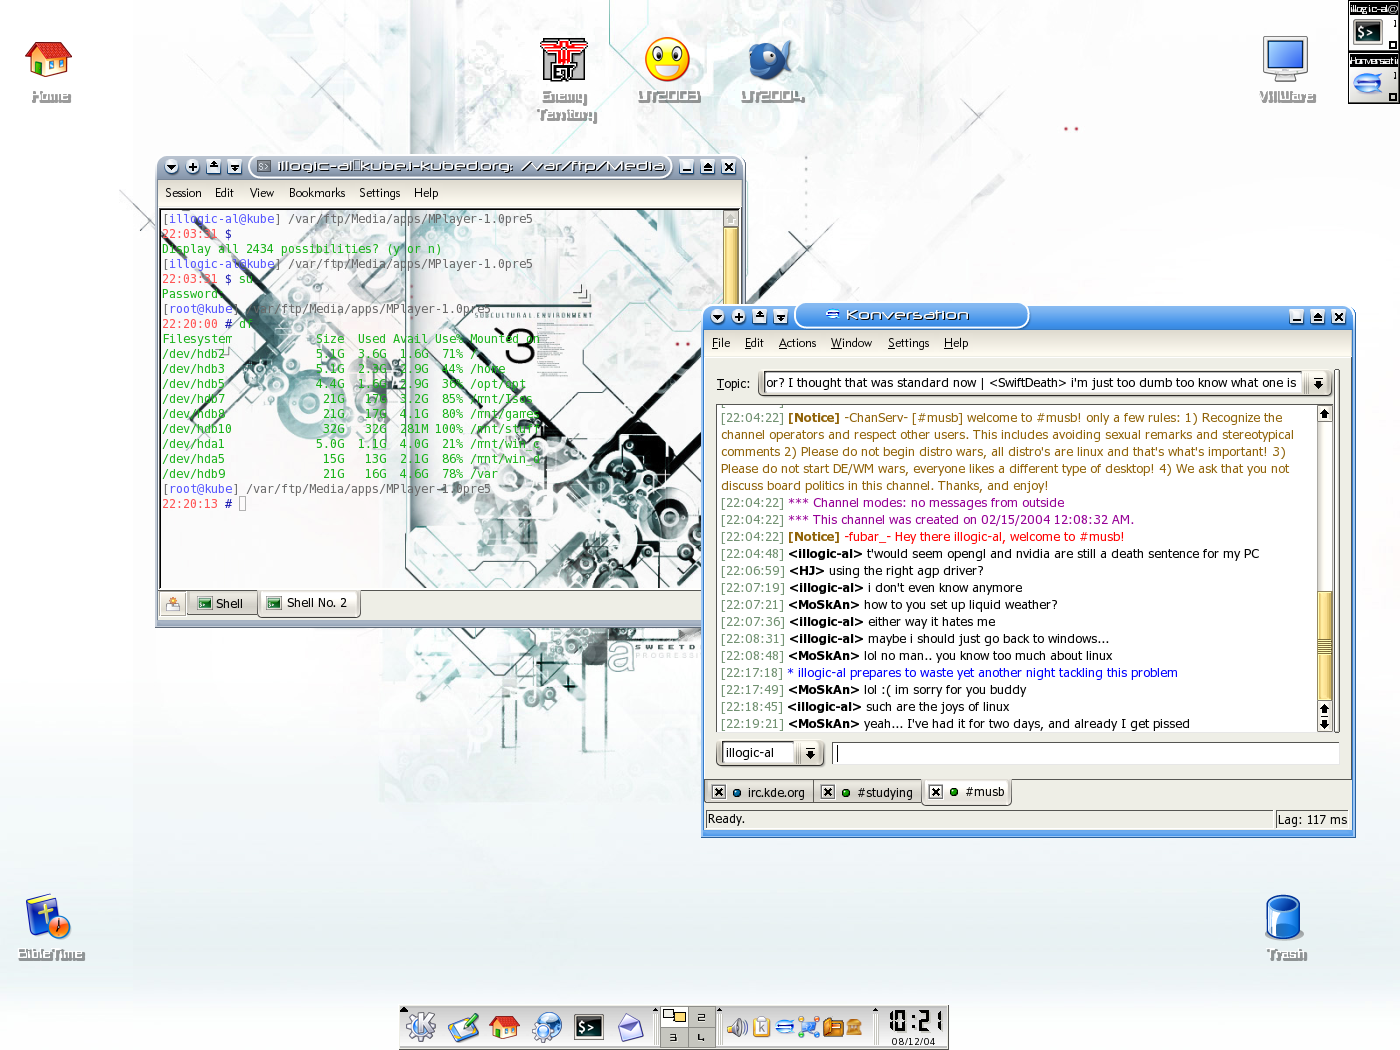
KDE 3.3.0. Nothing 'tacular
-
you can also use the kasbar panel extension which does support transparency.
-
chances are you didn't type it in correctly since it's highly unlikely you dont have it installed. just paste the command from here into the console If you still get an error paste that error, verbatim, in your next post
-
Browse: [About the FAQ Forum] [Table of Contents] [FAQs] [Contribute] [IM: Installing and Configuring Mandrake] IM-03: How do I get more software for Mandrake Linux? ::::Finding sources:::: Urpmi Sources are mirrors of the MandrakeLinux's ftp tree. To add extra sources to urpmi you have to find mirrors. You can get a list of mirrors by going to the Easy Urpmi Webpage ::::Adding sources using the command-line:::: You can do all this using the command line and like most things done on the command-line/console it is usually faster. The syntax for adding sources a la console is urpmi.addmedia name_of_source url_of_source with hdlist_of_source Using the Easy Urpmi Webpage makes adding sources from the command line really simple. All you have to do is: 1. Read the directions on the webpage. They are quite easy to follow and the information on this page will not always be up to date. 2. Select your operating system. 3. Select an architechture (the default is what most will use). 4. Select a mirror for each source which is close to you. Most people will want to add contrib and plf sources. Jpackage contains rpms of java programs. 5. Paste in the text which appears in the box below 3) Type this in a console as root As an example I'll show you the sources I've added using the console method. These are cooker sources which are unstable. I did this to make sure that no one just tries to copy this word for word. Using a little grey matter is a good thing sometimes :) 1. Log in as root by typing su in a console, then entering the root password 2. urpmi.addmedia jpackage ftp://mirror.cs.wisc.edu/pub/mirrors/linux/Mandrakelinux/devel/cooker/i586/media/jpackage with media_info/hdlist.cz 3. Now logout of root by typing exit I've just added a source using the console. But wait... there's more :) ::::Adding sources using a GUI:::: It's a relatively easy task to get more free software for your Mandrake Linux box once you know what to do. Unless you're in the Mandrake Club, there are 2 main rpm-based resources available to you for use: 2) PLF RPMs 3) Contrib RPMs These two sources should give you the oppurtinity to add things like DVD players, DVD rippers, extra games and artwork to you Mandrake Linux box which for one reason or another could not be added to the official discs. We will now look at how to add these sources using graphical utilities. The first thing you will need to do is open up the Mandrake Control Center. It will be in your menu under Configuration or on your menu panel. UPDATE ME 1. Once open, click on the Software Management icon. 2. Then click on Software Sources/Media Manager. You will now have to find add urls to describe the path to you new rpm resources. I usually add http sources because I find them to be faster. You have the option of adding either http or ftp servers. I'll show you how to add both. 3. Click the Add... The "URL" will be http://ftp.ibiblio.org/pub/Linux/distributions/contrib/texstar/linux/distributions/mandrake/9.1/rpms/ and the "Relative path to synthesis/hdlist" will be ./hdlist.cz 4. Click Ok and wait for the sources to be added to the urpmi database. If all goes well (check for typos) you will have just finished adding your first unofficial source. Next we will do ftp sources for plf and contrib packages. 5. Click on Add... For ftp servers a login and password can be added if necessary. We won't use any servers which require that here. Let's do plf first so for the "Name" you can put plf . The "URL" will be ftp://plf.time4t.net/pub/plf/9.1/i586 and the "Relative path to synthesis/hdlist" will be ../hdlist.cz *Note that there are two dots before the slash this time.* Again click Ok and wait for the source to be added to the urpmi database. 6. Finally we will add our contrib source, again from ftp. The "Name" will be contrib . The "URL" will be ftp://mirrors.secsup.org/pub/linux/mandrake/Mandrake/9.1/contrib/RPMS and the "Relative path to synthesis/hdlist" will be ../../i586/Mandrake/base/hdlist2.cz Click Ok one last time and wait for the source to be added to the urpmi database. Congratulations, you are now able to download software from all these sites using Rpmdrake or the urpmi command. ::::Advanced Tricks:::: Here you'll learn a couple of tricks which are best and I think only possible with the command line. First is adding gpg keys. Rpmdrake has a security feature which asks you if you want to install which does not have a recognized gpg signature. On the main plf page is a neat little trick to import their gpg key into the root user's keyring. To download and install the plf gpg key go to this link for instructions : http://plf.zarb.org/packages.php Another useful trick is trying to find out which mirrors are close to you so that you can get the best download speeds. The closeness of a mirror isn't the only factor influencing downloads (how many other people are downloading is also a factor) but it's a factor that is easily determined. To do this we will need the traceroute command. If you don't have it installed: 1. Open up a console and login as root 2. urpmi traceroute 3. Once installed you use traceroute like so traceroute url_without_http_or_ftp_prefix eg traceroute plf.time4t.net My rule of thumb is that, "the mirror which takes the least number of hops to get to you is the closest." The "hops" are numbered so it is pretty easy to figure them out. Oh yeah, before you forget, log out of root :) Want to know some mirrors so the you can find out how close they are? Go to the Easy Urpmi Webpage and check out the different mirrors there or go to the Mandrake Linux download page http://www.mandrakelinux.com/en/ftp.php3
-
the command on mdk is alsamixer
-
Browse: [About the FAQ Forum] [Table of Contents] [FAQs] [Contribute] [WM/DE: Window Managers and Desktop Environments] WM/DE-02: KDE KDE is a desktop environment; the K Desktop Environment to be specific. The K can mean anything you want it to mean, Killer, Kruddy, Krazy, etc. As was explained in WM/DE-01 (add link when moved) desktop environments provide much more functionality than simple window managers. Rather than convince you why KDE is the DE for you we'll attempt to help you decide for yourself by aiding you in the installation and configuration. What you use it for, and whether you even use it or not, is totally up to you :D Installation Installing kde via Mandrake's rpms is a simple task. Just open up rpmdrake as root and type in kde in the Search bar and hit the Search button. You can then chose which apps you'd like to install individually. To instead install everything at once do the following command as root urpmi kdeutils kdeaddons kdemultimedia kdeadmin kdeartwork kdegraphics kdebase kdenetwork kdepim urpmi will do its thing and take care of the necessary dependencies If you'd rather take build kde from source (which I recommend) check out this page: http://uhaweb.hartford.edu/obennett/html/d...build-kde3.html Configuration KDE is known for its configurability (and awesome eye candy but we'll get to that later) because they realize that not all users are the same and will probably want to change the default to suit themselves. KControl is the main method of configuring your KDE setup First thing I usually change are the Icons and Fonts. Crystal's cool and everything but I'm in Nuvola mode for the forseeable future ;-) And as for helvetica... no comment, it might come out wrong. There is an automated app in the form of the Desktop Settings Wizard which allows you to quickly personalize a new installation of KDE. To run it press [Alt]+[F2] to get a Run... box, then enter kpersonalizer. Using the Desktop Settings Wizard is a good way to attempt to get back to normalcy if your settings happen to go haywire while "tweaking" the desktop to your liking. It's possible to modify your mouse theme from the KDE Control Center. All you have to do is untar themes into your ~/.icons. I've no idea why this isn't ~/.cursors but I've long since given up trying to make sense of what developers do. You can also install the cursor_themes package if you have a contrib repository among your urpmi sources. These mouse themes will be available globally (to all users) instead of locally. To change the cursor theme open up the KDE Control Center and go to Peripherals > Mouse. Choose the Cursor Theme tab and select from a theme. If you then put your cursor over the section where the cursor previews you will get a live preview of how each cursor behaves, animations included. You can also configure the current resolution of the desktop or the resolution you want KDE to start up with. These options are present under Peripherals > Display. Some people may want to change the default browser from konqueror o_0 You can do this by going to Components/KDE Components > File Associations > text > html and adding the browser or moving it to the top of the list. Whichever browser is at the top of the list becomes the default. Newer versions of KDE have a Component Chooser which makes it easier to change the default browser. It's in KDE Components > Component Chooser In KDE 3.3.0 the KDE control center has a module for scpecific window settings in Desktop -> Window-Specifc Settings. It's not to look at by default but becomes useful after you've saved window settings there. I'll use KSensors as an example of how to set this up. My current desktop setup looks like this If you look to the right you see that the Kasbar (pager thing in top right of the screen) doesn't take up the whole of the screen. I decided to use ksensors to fill up that space but it didn't turn out quite right at first. pretend image is here... So then I removed the window border/decorations by doing [Alt]+[F3] -> Advanced -> No Border and resized using [Alt]+[F3] -> Resize. Kasbar doesn't like it's space being invaded so to move the ksensors window in the space under it I used the [Alt]+drag technique to move the window. The end result was this. pretend image is here... Now that I have it how I want it's time to save the settings. [Alt]+[F3] -> Advanced -> Special Window Settings.... I chose the Use window class (whole application) option at first. In the window that pops up I went the Geometry tab and selected the Position and Size options. I selected Apply Initially in the dropdown boxes. Then I hit OK and thought I was finished. I quit KSensors and restarted to check that everything was ok and got this: pretend image is here... As you can see it's not quite what I'd expected. I had forgotten about the border settings and the position was a bit off (told you Kasbar didn't like to share). And worse, even though you can't see it the all ksensors windows were in the same position at the same size. Definitely not optimal. I went back to the Desktop -> Window-Specific Settings in the control center and started modifying things. I went to the Window Extra tab and under Window title: chose Exact Match in the dropdown box. Then I moved on the the Geometry tab. Apply Initially didn't seem to be what I wanted so I chose Remember. Moving right along I went to the Preferences tab and clicked on the No border option and chose Force. Everything seemed in order so I click on OK, Applied the settings in the control center, and restarted ksensors. It still looked like it did in the previous shot, but now the setting only applied to the sensors window specifically. The Window title: setting in the Window Extra tab was the only one that worked as expected :-( I went back to the control center and started modifying the window settings again. This time I chose Force for the Position and Size entries in the Geometry Tab. When I went to the Preferences tab I saw that I had forgotten to select the radio button beside the Force option and did so. Hit OK, Apply, restart ksensors again and... Pretend there's a picture here... Voila! Exactly what I'd wanted. Awesomeness. It takes a bit of playing around (took me more than 3 times to get this) but it does work. There endeth the configuration section but stick around a while, there's more yet to come. Themation Theming in KDE is pretty simple. Want to install an Icon Theme? Download the zip or tarball (tar.bz2 or tar.gz) file that it's provided in and blaaaaaaaaaahhhh... Styles, themes and KDE specific (and not so specific) backgrounds for KDE can be found at KDE-Look.org. How's that for redundancy? SuperKaramba/Karamba themes can also be found at at kdelook. It's good stuffs (sic). Useration This section will be filled in by you, the user :D Just like the K in KDE, it can be anything you want it to be. Ciao.
-
you didn't login as root and do modprobe did you?
-
got this fixed yet? I might be able to help.
-
i'd suggest trying some other types/brands of disks. you can also try burning as root to see if it's related to permission settings
-
Step 2. as root modprobe soundcore Step 3. go into directory you untarred and type make then, as root, make install Step 4. Paste those lines into that file
-
That can also happen if you try to overclock and change the cpu frequencies too dramatically
-
Pepse, It's no longer a problem. The kernel guys took care of it.
-
KDE applications usually needs artsd running to provide sound, such is the case w/ kopete. To enable Artsd open up the kde control center and got to Sound & Multimedia > Sound System. Check enable the sound system, then go to the hardware tab and choose Threaded Open Sound System or ALSA. To get sound at start up go to the Mandrake Control Center > System > Servives. And make sure that both Alsa and Sound entries are checked. Hope that helps.
-
message

-
1) Edit /etc/X11/xorg.conf resp. /etc/X11/XF86Config The relevant section is InputDevice 7 button bouse (e.g. MX Series): Section "InputDevice" Driver "mouse" Identifier "Mouse[0]" Option "Protocol" "ExplorerPS/2" Option "Device" "/dev/input/mice" Option "Buttons" "7" Option "ZAxisMapping" "6 7" Option "Name" "Logitech MX 700" EndSection Do not change your "Identifier," that is specific to your configuration. You should make sure you have "Buttons" "ZAxisMapping" and "Protocol" all set to the above values. IMPS/2 may work also, but even for "non-explorer" intellimice, ExplorerPS/2 should work fine. This is for USB mice also, PS/2 is just part of the name, it does not mean that you have a PS/2 mouse. There are seven buttons on what appear to be five-button mice: left button, right button, middle button (push down on scroll wheel), scroll up, scroll down, side button 1, side button 2. info taken from http://www.linux-gamers.net/modules/wfsect...hp?articleid=46
-
sweet wallpaper MugenAcc99. Whered' you get it. More importantly where can I get it :)
-
already been using this for firefox since they'ne been available :)
-
Revised version up here. http://24.193.108.12/~illogic-al/ I've been messing about w/ the outer background and don't like what's th... hmm. y'know, the colors from the fast reply box look just about right }:)
-
/me bows to the MASTER
-
http://www.w3schools.com/html/default.asp that should answer your questions. that's site's got lots of good beginner info.
-
for bvc http://mandrakeusers.org/index.php?act=ST&...185#entry132882 my fvwm2 screenie.
-
tyme has also intrigued me with fvwm2. seems like i'll be wasting another weekend instead of doing real work. Thanks tyme :)
-
i'm a fool. meant qchem
-
truth be told i don't really care about 28.8k, but i do want it o have a reasonable load time on 56k. and in reply to what Ohms said, yah. the blog section needs some "oomph"